In an HGIC blog post earlier this year, I shared how easy it is to grow luffas (https://hgic.clemson.edu/growing-luffa/). Turning your harvested luffas into soaps is a fun and easy craft project for all ages.
Use the finished scrubbers in the tub, shower or to remove garden grime from hands. The finished project may also be packaged for gift giving or sold as a fundraiser for school gardening projects.
Supplies You Will Need:
- Luffa sponges (home grown or purchased)
- Soap mold or small plastic containers
- Serrated kitchen knife
- Spoon
- Cutting board
- Glass measuring cup with spout or other microwave safe bowl with spout
- 2 lb block of melt and pour soap base (available at craft stores and online retailers)
- Small spray bottle
- Rubbing alcohol
- Essential oils (optional)
Optional supplies for cleaning home grown luffas:
- Bucket
- Household Bleach
- Gloves/Eye Protection
Step by step guide to making luffa soap scrubbers:
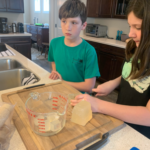
Note adults should supervise each step of this project. Make sure children wash excess soap off their hands before touching eyes or mouth.
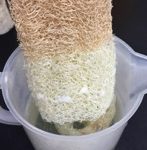
Luffa sponges are ready to harvest when the skin feels loose and brittle around the hardened fibers inside. To process the sponges, peel the skin off and shake the seeds loose. Be sure to save the seeds for future crops!
Luffas that are grown in your garden may need to be bleached prior to use to remove any mold and mildew on the fibers. Full-sized luffas can be purchased from local growers or online to use for this craft project.

Soak dingy luffas with the outer skins and seeds removed in a solution of 10 parts water to 1-part bleach for about an hour to remove any stains and allow to dry completely before making soaps.
Next, use a serrated knife to slice whole luffas into rounds approximately 1-1 ½ inches thick. Thickness will depend somewhat on the molds you choose to make your soaps in.
We chose oval-shaped silicone soap molds for this project. Small flexible plastic containers can also be used. Upcycled food packaging could be used i.e. yogurt containers. Shallow molds work best for removing soaps without damaging them.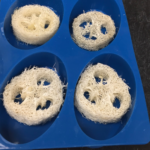
Purchase melt and pour soap base from a craft stores or online retailers. Clear soap bases allow the luffa to show through making them visually appealing. Solid white soap base can be used and colorants added. These products are also available where soap making supplies are sold. Using a serrated knife, carefully cut the soap into smaller cubes. Place cubes in a microwave-safe glass measuring cup.
Melt the soap base following package directions. We found microwaving in 30-second increments and stirring often worked best.

Add 10-15 drops of essential oil if desired, stir well to distribute.

Place luffa slices in molds and spritz each with rubbing alcohol to reduce air bubbles on the surface of finished soaps.
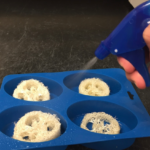
An adult should pour the melted soap base into each mold to avoid burns and spills. Fill each mold to the top with melted soap base. Spray again with rubbing alcohol to keep the luffas from floating in the molds. Do not move molds while the soap base is still melted. Allow to cool in place until hardened.

Once the soap has cooled enough to move, place molds in freezer for a few minutes to make removing them easier.

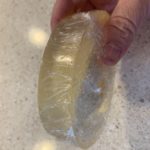
Once the soap has reached room temperature again, wrap the finished product in plastic wrap or package in baggies to keep them from taking on moisture until ready to use. Enjoy!