
HTML editing in Canvas can be a huge benefit to your course! Today, we will cover the basics of what you can do with HTML editing in Canvas. Anyone can use HTML, even if you have no coding experience or computer science background. Here are some short bits of code that can enhance your Canvas course and make it easier for students to navigate.
Overview
Canvas’s Rich Content Editor (RCE) offers a solid set of tools for building and formatting pages, but some design challenges are difficult to solve using the RCE alone. That’s where the HTML editor comes in. It provides straightforward solutions and additional design flexibility that the RCE can’t always offer. This workshop walks through five common design obstacles you might encounter, along with simple HTML solutions to solve or improve each one. To switch to the HTML editor in a Canvas page, click the More (two carets) icon at the bottom of the RCE, as shown below.

Horizontal Lines as Page Dividers
Instructors often include a lot of information on a Canvas page and may want to break it into more manageable sections. Using HTML, you can add horizontal lines as page dividers, providing a clearer visual separation than headings alone. Simply copy and paste the HTML snippet below into the HTML editor between the paragraphs where you want to separate content.
<hr style=”border-color: #000000; border-width: 3px; width: 100%;” />
Here are some tips for adding horizontal lines as page dividers:
- Change thickness of your line by adjusting pixels (px).
- Change color of your line using HEX color codes (#).
- If one element is too close to another above or below, add a paragraph break using this snippet: <p> </p>
Image Padding
When adding an image to your Canvas page, the formatting can sometimes be strange. Images and text can often appear next to each other alongside a gap in between text lines. HTML editing can fix your image and make your page look better. Instructors can use image padding to create white space around your photo or graphic. Locate the image tag in the HTML editor starting with <img and add the code inside. All three choices provide different margins around the image.
style=”float: left; margin: 10px;”
style=”float: left; margin-right: 10px;”
style=”float: left; margin: 0px 20px 0px 0px;”
Here are some tips for image padding:
- Adjust pixels to create more or less space around image.
- Float right or left on the Canvas page by changing the word after “float:” from “left” to “right.”
- The first snippet will provides the same margin on all sides, floats right.
- The second snippet provides margin only on right side, floats left.
- The third snippet allows you to customize all sides (top, right, bottom, left), floats left
Background Color
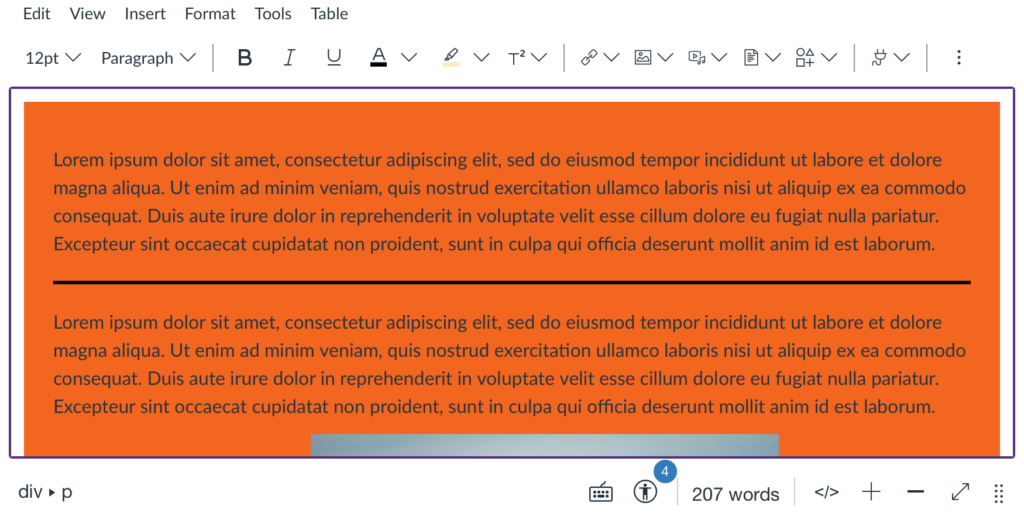
Instructors may want to add more visual variety to their Canvas pages. Using HTML, you can customize the background color of a page to create greater visual interest or improve contrast. To apply a background color, paste the HTML snippet below at the top of the page in the HTML editor.
<div style=”background-color: #c8c9c7; padding: 25px;”>
<p>YOUR CONTENT HERE</p>
</div>
Here are some tips for changing the background color:
- Change color of background using HEX color codes (#).
- Verify that chosen colors provide enough color contrast for accessibility.
- Change text color with RCE.
- Everything between <div and </div> will have this background color.
Embedding a Webpage
Instructors may want to include readings or other resources in their Canvas course while allowing students to view them without leaving Canvas. Using HTML, you can embed content directly into a page, making it easier for students to access course materials and reducing the number of clicks required. Paste the HTML snippet below into the HTML editor to embed your content.
<p><iframe src=”PASTE URL HERE” width=”100%” height=”1000″ style=”overflow: hidden;”></iframe></p>
Here are some tips for embedding a webpage:
- Replace “PASTE URL HERE” with link to desired page.
- Change the height (px) to lengthen or shorten the embedded element. Change width (%) to embed more or less of the page. (You’ll still be able to scroll.)
- If it’s a Google Doc, ensure you have the proper share settings.
Simple Buttons
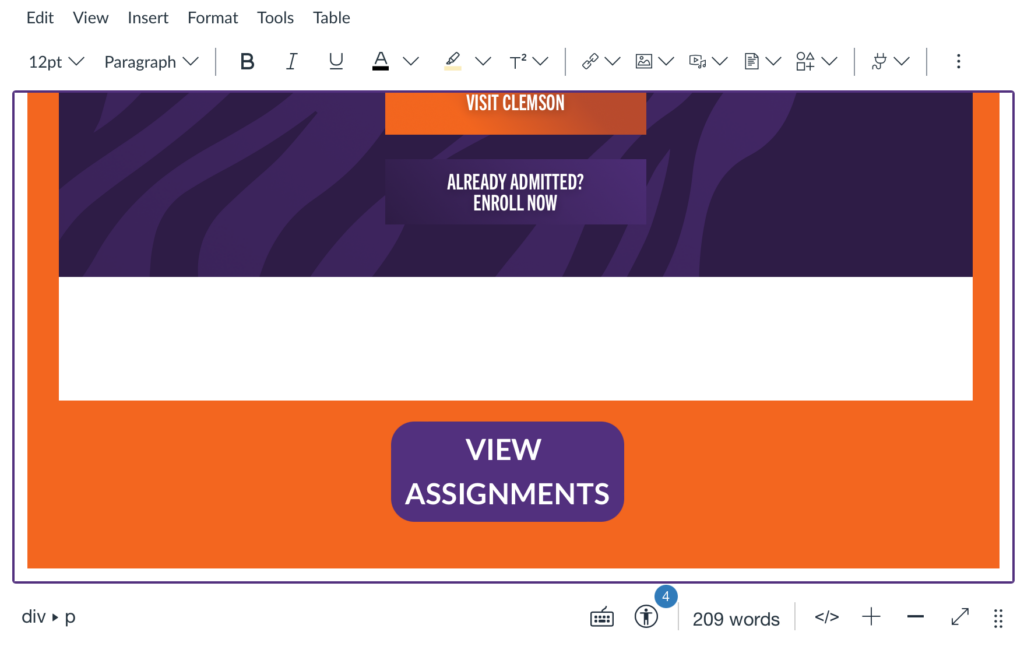
HTML can also improve course navigation by making it easier for students to move through your Canvas course. Creating buttons helps important links and actions stand out, making it clearer where students should click or what they should do next. Paste the HTML snippet below into the HTML editor to create a button in your course.
<p style=”text-align: center;”><a class=”button” style=”border-radius: 20px; color: #ffffff; width: 200px; padding: 5px 5px; margin-right: 10px; margin-bottom: 3px; text-align: center; text-decoration: none; display: inline-block; font-family: Arial, sans-serif; font-size: 20px; cursor: pointer; background-color: #f56600;”><strong>BUTTON TEXT</strong></a></p>
Here are some tips for creating simple buttons:
- Change background or font with HEX color codes (#).
- In the RCE, replace BUTTON TEXT with your text and hyperlink the button text (course link or external).
- Want to do four or six buttons? Copy code from the FRC’s button page (self-enroll in the FRC here.)
General HTML Editing Tips
- Move from the RCE and HTML editing with </>
- Restore a previous version of a Canvas page with “View page history” (top right settings)
- Resize or extend the editor box (RCE or HTML editor) by clicking the eight dots in the bottom right
- Add a single space line by clicking Shift + Enter (RCE)
- Common Clemson colors and hex codes
- Clemson Orange #F56600
- Goal Line (white) #FFFFFF
- Regalia (purple) #522D80
- College Avenue (dark grey) #333333
- Diploma (dark purple) #2E1A47
- Campus Brick (dark orange) #B94700
- Canvas’ default text color is #2D3B45 (dark grey/blue)
For a full visual demonstration, watch the training video.
If you have any questions, schedule a consultation with Clemson Online!

Upcoming Events
Quick Hits: Grade Weights, Extra Credit, and Canvas Gradebook Settings
Thursday, July 30th, 3-4 PM
Facilitated by John Dickinson, IT Services Specialist.
This quick hit will cover helpful settings in the Canvas gradebook, including utilizing grade weights effectively and incorporating extra credit in your course. We’ll focus on practical strategies to streamline your workflow and save time managing grades.
Click here to register for this Quick Hits!
New Instructor Conference
Thursday, August 13th, All day
The Office of Digital Learning and Technology’s annual New Instructor Conference will take place on August 13, 2026. The conference will cover everything new instructors need to know about getting started with Canvas, including setting a Canvas home page, creating assignments, organizing course content, grading online work, and more!
Click here to register for the New Instructor Conference!
Clemson Online Summer 2026 Events Calendar
Review our Summer 2026 Events Calendar to see what Online Instruction Development opportunities await!

We have a robust lineup of topics and live training formats to support your use of Canvas and other e-learning tools. Topics cover demonstrations of using Kaltura, engaging your students, and workshops to get your Canvas site ready to teach!
All of our live training is recorded. Registrants will automatically receive a link to that day’s video after it has been processed.
Contact Millie Tullis with any questions regarding these sessions.

Clemson Online – Where Tech and Teaching Meet