Video
1. Setting Up Your iPhone for Video
Turn on the grid option to follow the rule of thirds:
Settings > Camera > Grid > toggle on
Placing the main subject of the video along these lines creates a more visually compelling shot.

2. Choosing Your Shot
Plan out your shots. Resist the temptation to move your phone around in one continuous shot. Instead, consider breaking that one shot into multiple, shorter clips:
- Shot of you talking about what you see and/or how to do something
- Different and separate b-roll shots that line up with what you spoke about in the previous clip
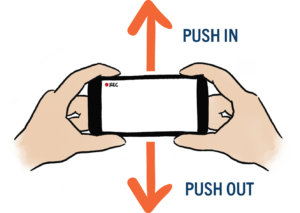
Keep the phone orientation consistent in each clip: Choose between landscape or portrait (landscape is preferred unless you’re filming video for a social media story).
When filming yourself or others, don’t wear sunglasses and don’t chew gum. Check the scene for any distracting objects or elements. Make sure there are no branded items, graffiti, and non-Clemson or licensed graphics within frame.
3. Composition
When taking a video of yourself using the front/rear camera, keep the phone eye-level or slightly below to create a low-angle shot. When taking a video of the subject/topic, it is up to your discretion to use a variety of shots:

Keep your horizon-line level across the screen when the camera is on you or someone else. Keep yourself/the subject in the full frame of the camera to make sure parts of your face or the subject aren’t cut out.
4. Adjust Lighting and Exposure
Work with natural lighting when filming outside.
Do not film in the middle of the day, unless it is cloudy or overcast, to avoid harsh lighting and high contrast. If you find yourself filming at or around 11am-4pm, consider finding a large patch of shade, or move indoors for your speaking/interview parts. Make yourself or others look best by filming at the “golden hour” (one hour before or after sunset/sunrise). This will soften the shadows on your face and boost the quality of your shots. When filming in sunlight, it is best to have yourself and the camera perpendicular to the sun or aligned with the sun to avoid backlighting of the subject. If aligned with the sun, watch out for shadows of the person filming.
Create proper exposure before you begin filming.
To determine if your exposure is correct, refer to the example images below. Look for any spots that seem too bright on the subject or in the background. This can cause details on your subject to disappear. You can change the exposure (brightness) of the subject on your iPhone by tapping and holding your finger on the subject of the video then slide your finger up or down depending on the desired exposure. If the subject is too dark, slide up to increase exposure. If the subject is too bright, slide down to decrease exposure.

Underexposed

Proper Exposure

Overexposed
5. Audio
Work with natural lighting when filming outside.
Stay away from wind, loud noise areas (construction sites, heavy ventilation areas), roadsides, people outside of the filming process, or rivers. Record your voice again if necessary. If the audio of the clip is compromised, directions/talking points will be overlaid atop of the video when sent to Ron Weber.
6. File Handling
Once you have finished filming, you can upload the clips in two ways:
- Plug the phone into your computer and select the phone in your Finder/File Explorer and copy and paste them onto your MAC/PC. Next, open Box and drag the clips into a new folder.
- Upload the clips directly to a new Box folder using the Box app on your device.
Name the clips “Project Name_Last Name First Name_type/purpose of clip”.
Example: Coastal REC_SmithJohn_broll.
Do not email or text clips, but please notify Ron Weber at raweber@clemson.edu when you have uploaded the videos, and provide the link to the Box folder.
Photo
1. Setting Up Your iPhone for Photos
Turn on the grid option to follow the rule of thirds:
Settings > Camera > Grid > toggle on
Placing the main subject of the video along these lines creates a more visually compelling shot.

2. Choosing Your Shot
Before taking a photo, check the scene for any distracting objects or elements. Move closer to the subject if necessary or move unwanted distractions from the frame of the photo. Make sure there are no branded items, graffiti, and non-Clemson or licensed graphics within frame.
When capturing a small object, or an object with a lot of detail, (i.e. flowers or insects) move closer to the subject, DO NOT zoom in. Zooming in decreases the quality of the image, so it is best to physically move the camera closer to the subject when possible.
3. Composition

Pick the right orientation for your subject.
Choose the orientation that best allows the subject to fill the frame of the photo. When deciding between a landscape or portrait orientation, keep in mind that different social media platforms have different formats.
Find leading lines to draw attention to the subject.
When possible, use leading lines in your image to help lead the viewers eye to the subject of your image. These are lines that run from the edge of the photo toward the center of focus as shown in the image on the right.
Follow the rule of thirds.
Using the grid of the camera screen, align the subject at intersections of the grid to create the most visually appealing image.
4. Adjust Focus and Exposure
iPhones automatically guess what the subject of your photo is but doesn’t always get it right. To make the subject in focus, tap the screen where you want to focus.
You can change the exposure (brightness) of the subject on your iPhone in the same way. Tap and hold your finger on the subject of the image then slide your finger up or down depending on the desired exposure. If the subject is too dark, slide up to increase exposure. If the subject is too bright, slide down to decrease exposure. In general, it is better to err on the side of an image in which the subject is a little too dark than a little too bright.
The iPhone camera will default back to its automatic settings when you move your phone from the subject (or if something moves in front of the camera). To prevent this, tap the screen and hold your finger down for a few seconds. When you see AE/AF LOCK appear in yellow at the top of the camera screen, your settings are saved.
5. File Handling
Once you have finished taking photos, you can upload the clips in two ways:
- Plug the phone into your computer and select the phone in your Finder/File Explorer and copy andpaste them onto your MAC/PC. Next, open Box and drag the photos into a new folder.
- Upload the clips directly to a new Box folder using the Box app on your device.
Name the Box Folder “Event/Subject Name_Year.Month.Day”.
Example: Coastal REC_2023.04.15
Do not email or text photos, but please notify Bek Rogers at rdiamon@clemson.edu when you have uploaded photos, and provide the link to the Box folder.
Contact Us
For questions about video, please email Ron Weber at raweber@clemson.edu.
For questions about photo, please email Bek Rogers at rdiamon@clemson.edu.
